#navbar-iframe { height:0px; visibility:hidden; display:none; }

Saturday, September 10, 2011

Teriyaki-Flavored Happiness (or, These Vegetables Aren't Going to Eat Themselves!)


If you've been following my blog, you may notice the same ingredients used in multiple recipes. There's a really good explanation for that: I'm a normal person and not a gourmet cook. I make a trip to Whole Foods once or twice a year, for example, to purchase specialty ingredients and to stock my freezer with vegan meat alternatives. Other than that, I'm shopping down the street at Kroger, Meijer, or on a day when the three boys aren't trying to kill each other in the back of the mini-van, I may get a trip into the local health food store.

As far as the purchase of fresh vegetables goes, I have learned to think with my brain and not with my eyes in the produce section. When I stopped eating meat, I suddenly became a fresh vegetable hoarder. I. Had. To. Have. Everything. Every color and variety of peppers, everything labeled as organic, each and every kind of leafy green. I wanted everything and I wanted it all at once. And like a hoarder, my "collection" took on a life of its own, quickly turning bad before I could get to everything. My peppers got soft and wrinkly, my organic mushrooms were covered in slime, and my leafy greens dissolved into gelatinous black goo. I had to admit I was throwing out more than I could eat each week.

So- after a few months of fuzzy tomatoes, I wised up. I started purchasing produce more strategically. I refused to make eye contact with that already-ripe avocado unless I knew I was going to use it that night. I bought less, and attempted to use all of it before I purchased more. I'm not always successful. Right now as I type this, there are four tomatillos well past their prime, mocking me from a bowl on my counter.

Which brings me back to the beginning of this post. I write this blog for people like me, who want to eat healthier but aren't about to run up to the grocery store each day. I'm a working mom with a realistic grocery budget who hates to waste food. If I bring home a bag of shallots, you're going to see shallots in most of my recipes until they're gone, People. That's just how I roll.

Today's recipe was made with all my remaining fresh vegetables prior to Friday's trip to Kroger. A stir-fry it is!

4 Gardein Scallopine cutlets, thawed
1 cup teriyaki sauce
2 teaspoons minced garlic
1 teaspoon fresh, ground ginger
1 teaspoon Five Spice powder
1 teaspoon onion powder
2 tablespoons agave nectar
1 tablespoon sesame seeds
1/2 teaspoon toasted sesame oil (optional)
Freshly ground black pepper
Vegetables for stir fry (I used cauliflower, shallots, portobellos, Brussels sprouts, bok choy and radicchio)
Grain of choice (I used brown rice)


1. Combine all the ingredients (except for vegetables and rice) and marinate for at least 20 minutes. I have a Food Saver Marinator, and it is one of my favorite things.
2. Add a little oil to a large skillet and heat it over medium-high heat. Add the marinated cutlets and cook about three minutes on each side, or until they start to brown up.
3. Add the reserved marinade to the cutlets in the skillet, and bring to boil. Reduce heat to simmer and let the marinade reduce down. You want it to get nice and thick, but still liquid-y enough to pour some over the vegetables when serving.
4. Meanwhile, do a quick stir-fry of the vegetables in a hot skillet with a little oil.
5. When it looks like the vegetables are almost done and the marinade is thickening, remove the cutlets to a platter so they can rest for about two minutes.
6. To serve, arrange vegetables over prepared rice, spoon a little of the marinade over them, and top it all with sliced cutlets.

Note: We had two cutlets leftover that we didn't eat. Later that night (as I am wont to do) I tiptoed to the kitchen under the cover of darkness for one wee bite more. The "chicken" was so good, ice cold and coated in the sauce, that I not only ate one entire piece, but TWO. I went to bed with sticky fingers and a smile on my face. So, long story short, these are amazing cold, and would be a great addition to a sandwich or salad, or as a midnight snack!

Pin It!

Thursday, September 8, 2011

Corn Fritters You Can Bring to a (Vegan) Hillbilly Hoedown


The first time I heard of corn fritters was as a little girl, thumbing through The Beverly Hillbillies Cookbook (yes, it's real. My mother used to have it. Ours was from the 1970's, but there appears to be a newish version from the 1990's). It was one of the first recipes I ever made on my own (with the exception of the frying in oil part- for that I was an eager spectator).

What I loved about corn fritters is that they combined two of my favorite things: corn, and deep frying! There were times as an adult that I had to admit I'd eat just about anything if it were deep-fried, and at least corn fritters started with a somewhat healthy vegetable.

When I thought about updating this to be vegan-friendly, I focused on more healthful choices of ingredients. What I didn't want was to essentially lose the guilty pleasure of eating them, though. So, suffice it to say these aren't going to melt your inches away. But they ARE chock full o' fiber, so there's that!

My favorite way to eat these is cold, but I'm told I'm weird that way. They're just fine hot, too. This basic recipe can easily be altered. For instance, use unbleached white flour instead of spelt for a "lighter" fritter, or add some cilantro and cumin, or you could omit the tumeric and peppers and sprinkle the finished fritter with vegan powdered sugar for a sweet treat. Whatever you do, be sure to drain them thoroughly after frying.

Corn Fritters

1 cup spelt flour
1 teaspoon baking powder
1 teaspoon salt
¼ teaspoon tumeric
1 teaspoon nutritional yeast
2 tablespoons golden flax meal mixed with 6 tablespoons of water (let it sit a few minutes to thicken)
¼ cup non-dairy milk, unsweetened
2 teaspoons grapeseed oil
15 ounces canned corn, drained
1 tablespoon (more or less to taste) diced cherry peppers
Oil for frying


1. Blend flour, baking powder, salt, tumeric and nutritional yeast in a bowl.
2. In a separate bowl, beat prepared flax meal with milk and oil. Stir into flour mixture and add corn and peppers. It might be easier to mix gently by hand. Mixture will be fairly wet and thick.
3. Drop by tablespoonful into hot oil. Press dough until it's flattened a bit while it fries. Cook on medium-high until golden brown, about 2 minutes per side. Drain thoroughly on paper towels. Serve hot, or chill for an hour or so in the fridge and serve cold.

Pin It!

Monday, September 5, 2011

Liberating Beatific Beans from their Flavor Packet Oppressor


Bean soup is a thing of beauty. The colors and textures of the beans combined with their nutritional properties make them something worth savoring. I love the bean aisle in my grocery story, but for some stupid reason the dried beans are relegated to the bottom shelf (much like poetry in a book store. Hmmm . . . that's an interesting coincidence). They are all so pretty to look at, and always so inexpensive. You really could live on 'em.

During my last couple of trips to my local grocery story I've paused in front of the bags of mixed beans, which always contain packets with "natural ham flavoring." The beans themselves are so healthy, why in the world would you tear open one of those oddly-colorless packets and injest that crap? To quote Snoopy, "Bleeeeech!"

Last week, I bought the darn bag anyway, and figured I could easily make a delicious bean soup without resorting to chemical suicide via powdered pig-essence.

NOTE: Yesterday's post included a marinade I made for my tempeh recipe. I used the reserved marinade for today's soup. If you didn't make that recipe (and why not? It is so darn good!) you can just use the ingredients for the marinade, simmer it to reduce it by half, then strain it before adding it to today's soup.

Beatific Bean Soup

20 ounce bag of mixed beans (sans the hellacious flavor packet)
Marinade from yesterday's post, simmered until reduced by half
1 container Imagine Low Sodium Vegetable Broth
1 container Imagine No-Chicken Broth
1 tablespoon of dark miso (if needed. You'll add it after a taste check if you do)
½ cup chopped onion
3 cloves fresh garlic, minced
1 tablespoon basil
1 tablespoon oregano
1 tablespoon nutritional yeast
1 teaspoon liquid smoke (definitely optional. If you aren't into "smoky" flavors, don't add it in)
½ cup cashew cream (optional. It makes it creamy-dreamy. You could also add vegan sour cream or skip this part altogether)

1. Thoroughly pick through and rinse the beans. Put them in a glass bowl big enough to accomodate them doubling in size. Add enough water to cover and soak overnight. I do an initial drain and rinse after a few hours of soaking to clean the beans more. Then I add fresh, purified water because I use the soaking water in the soup. (Yep. You heard correctly. I know there are different camps on this, but if the beans are clean and the initial yucky stuff is rinsed off after a few hours of soaking, I say go for it. The flavor is better and the soup is creamier.)


2. The next morning, add the beans, the soaking water, and all of the remaining ingredients (except for the miso and cream) to a large Crock Pot and turn on high.


Note: If you DO add the miso, put it in a coffee cup with a ladle-full of hot broth. Mix it to dissolve it before adding it all back in the soup.

3. After 3 hours or so, taste the broth and determine if it could use some more saltiness; if so, add the miso.

4. Soup is ready to serve when the beans are tender. It took about 4 hours in my Crock Pot. Add a dollop of cashew cream or vegan sour cream if desired to each serving. Make sure to eat it with some good bread!

UPDATE! Like most of the country, we're big on leftovers. This recipe made A LOT, and so we were faced with 3 days of bean soup. Here's how I switched it up each day to make it more exciting:

Day 1 Leftovers:

Leftover soup
1 tablespoon minced garlic
1 cup chopped portobello mushrooms
1 cup diced onions or shallots
6 large Brussles sprouts, cleaned and quartered
½ cup quick-cooking barley
½ cup forbidden rice (or wild rice)
Salt and pepper to taste.

1. Put leftover soup (in batches, if necessary) into a blender and purée until creamy. Add soup to stock pot on stove and set to simmer.
2. Sauté barley and rice in a tablespoon of oil over medium heat until it begins to brown and get fragrant. Add grains to soup.
3. Add more oil to the skillet you used for the rice, and heat up the minced garlic. Add all the vegetables, tossing to coat with oil and garlic. Cook over medium heat until vegetables begin to camerlize. Add to soup.
4. Simmer soup until rice and barley are tender. Taste and add salt and pepper as needed.

Day 2 Leftovers Day (or is it day 3? By now I've lost count!)

Soup from yesterday (which will now have thickened very much, due to the barley and rice)
½ cup firm tofu, cut into cubes
1 tablespoon minced garlic
1 tablespoon freshly chopped cilantro (or half that if using dried)
1 teaspoon cumin
Minced hot peppers to taste (I use a hot pepper relish)
1 tablespoon Tofutti sour cream
Favorite wraps (whole wheat, etc)
Olive oil

1. Reheat the "soup," which will now have the consistency of refried beans.
2. Meanwhile, sauté the tofu over medium-high heat with olive oil, cilantro and cumin until it starts to brown up a bit.
3. Mix in a ½ teaspoon or more of minced hot peppers into a tablespoon of vegan sour cream. Spread cream mixture on a wrap.
4. Build a wrap with the "soup" and tofu. Toss in some Daiya cheese or avocado slices if you're feeling it!

Pin It!

Sunday, September 4, 2011

Lemon Picatta Redemption


My favorite dish to prepare in my past (meatatarian) life was lemon chicken (much like Debra in "Everybody Loves Raymond"). I loved the process of making it, I loved the smells as it cooked, I loved sneaking bites during the preparation. I loved how it looked on the plate and especially loved it the next day, cold and straight from the fridge. It was one of the dishes that truly gave me pause when I thought about cutting meat from my diet.

So, it was the very first recipe I attempted to veganize. I knew I could use vegan "meats" from my freezer, but I wanted to try a healthier alternative. It wasn't until I tried tempeh that I felt I had a winner. Tempeh is a great substitute for the chicken and takes on the wonderful flavors in the skillet. Tempeh is so dang good for you and I was really pleased to find another way to get the stuff in my belly. This will make your mouth happy!


Prepare the tempeh a few hours or the day before as follows:

1 package (8 ounces) of tempeh
2 tablespoons soy sauce
Enough water to cover tempeh in sauce pan

For marinade (put in a non-reactive dish or Ziplock bag):

½ cup white wine or cooking sherry
1 tablespoon dark miso, dissolved in 1 cup of hot water
1 cup Imagine No Chicken Broth
¼ cup lemon juice
1 teaspoon capers
½ tablespoon poultry seasoning
1 teaspoon sage
1 teaspoon rosemary (fresh is ideal and -of course- I didn't have any fresh)
2 cloves garlic, minced
1 teaspoon onion powder
1 tablespoon minced onions
1 teaspoon white pepper (or black pepper- your choice)


1. Slice tempeh into about 12 equal pieces (see "step-by-step" picture).
2. Place tempeh in a saucepan with 2 tablespoons of soy sauce and enough water to cover; simmer for 10 minutes.
3. While it’s simmering, prepare marinade. When tempeh is done and still hot, remove from water and place in marinade (marinate at least 2 hours; overnight works best).


STRAIN AND KEEP THE MARINADE FOR TOMORROW'S POST- IT WILL BE WORTH IT!


Now you’re ready to prepare the picatta!


Prepared tempeh
1 cup flour
Salt and pepper to taste
½ tablespoon nutritional yeast
Egg Replacer (equivalent of 2 eggs)
2 tablespoons olive oil
1 tablespoon Earth Balance
½ cup water
1 cup sliced mushrooms (I like them a lot and usually add more)
Juice and zest of 1 small lemon (more if you like it über lemony. When I made it today I was out of fresh lemons, and had to use bottled juice. Not the same, People!)
½ cup cooking sherry or white wine
1 teaspoon capers, drained
½ cup fresh parsley


1. Dredge tempeh in Egg Replacer then dust in flour seasoned with salt, pepper and nutritional yeast.
2. Add oil and Earth Balance to a deep skillet. Brown tempeh in skillet over medium heat (about 3-5 minutes each side). Remove tempeh and set aside.
3. In the same skillet, add water and mushrooms; cook for 1 minute, using spatula to pick up all the brown bits and cooked flour in the bottom of the skillet.
4. Add wine, lemon juice, lemon zest, capers, and parsley, bringing to boil.


5. Return tempeh to skillet, reduce heat to simmer, and cook for about 10 minutes, turning tempeh half way through. The liquid will get pretty thick. Keep an eye on the pan so the liquid doesn’t completely boil away; when the tempeh is good and hot and it's all thick and yummy-looking in the pan you're ready to eat! Serve with vegetables and pasta or grains. I served it with whole wheat orzo.

Pin It!

Wednesday, August 31, 2011

Easy-Peasy Butterbean-y Soup


There are rules in our kitchen, folks. Since I started this blog, the number one rule is we don't eat anything unless it's been photographed step-by-step. That way, if we make a winner, I have the blog post halfway done before we even eat.

My ex-husband didn't always follow this rule. When he cooked, he was cooking to eat, not document all the steps along the way for Vegerrific. In his defense, before we "vegged" out, he usually cooked more than I did. Since our change to a vegetarian lifestyle, however, he was often relegated to the taster role. He never complained, but I know he still loves to cook, and he's really good at it.

One of the things I always admired about his cooking skills is his ability to whip up a soup from any old thing in the pantry. On this particular day, he stuck his head in the pantry, pulled out 3 cans, and had this soup on the table 30 minutes later. Obviously, fresh carrots and potatoes would've been ideal, but this was simple, fast, and delicious. He honestly had a fragrant, bubbling soup pot going in the time it took me to do a load of laundry. If I had known what he was up to in the kitchen, I would have been taking pictures along the way. But he was very sneaky about it! 

Easy-Peasy Butterbean-y Soup

1 carton Imagine Low-Sodium Vegetable Broth1 tablespoon olive oil
1 onion, chopped
1 tablespoon fresh garlic, minced
3 tablespoons fresh flat-leaf parsley, chopped
1 tablespoon Earth's Balance3 tablespoons unbleached white flour1 can (15 ounces) butterbeans, drained and rinsed
1 can (15 ounces) sliced carrots, drained and rinsed
1 can (15 ounces) potatoes, drained, rinsed and cubed
4 bay leaves
1 tablespoon nutritional yeast flakes, optional
Salt and pepper to taste

1. Heat oil in a soup pot over medium-low heat. Add onions and garlic, cooking until transluscent. Add the parsley and cook until soft.
2. Add the Earth's Balance and stir until melted. Add the flour to the mixture and cook about 5 minutes, until the flour begin to brown up and become fragrant.
3. Add beans, carrots, and potatoes. Stir and cook a minute or so. Season mixture with salt and pepper to taste.
4. Add the broth, stirring gently. When it reaches a boil, reduce heat to simmer.
5. Add bay leaves. Add nutritional yeast (if using. He didn't use it when he made the soup, but I added it to the leftovers). Cover and let soup simmer for 20 to 30 minutes. Stir occasionally. Taste soup as it's simmering and adjust seasoning if needed.
6. Remove soup from heat and let stand for 5 minutes before serving.

Pin It!

Monday, August 29, 2011

Tossed Tempeh Salad with "Creamy" Italian Dressing


Truth is, I could live on tempeh. That's not quite an exaggeration. I love the darn stuff, and I never would have tried it had I not given up meat. When I first started cooking tempeh I followed the advice of many food bloggers to steam or simmer it to remove its "bitterness." I still occasionally go through the steaming or simmering, but I've grown to love the way it tastes as is. My taste buds truly have changed.

I have also found that tempeh does help me lose weight. When I eat plain old tempeh a few times a week, the scale always stays the same or goes down. This is my experience, and I'm basing it on nothing other than my scale.

It’s also one of the least expensive protein sources out there, at my grocery store, anyway. Here’s why: no one where I live knows what to do with the stuff! It is most always on sale because it’s nearing the expiration date. I just check to see if they have stock ready to get pitched then buy all they have. I usually pick it up for $1.49 a package and throw them in the freezer. Depending on what I’m making, 1 package of tempeh is a minimum of 2 servings (usually it’s 4). That’s .37 cents a serving! (Or free- since I often find coupons on eBay for Lightlife tempeh, and when they're doubled my tempeh score is all free free free) Beat that, chicken wings!

Speaking of chicken brings me to my favorite way to prepare tempeh. When I fry it in oil like this, I swear it tastes like chicken to me. Often I fry up a batch and throw it in the refrigerator; I love it cold when it’s prepared this way.

Tempeh is an acquired taste, though. My husband will not eat it. He has eaten every one of my experiments, but draws the line at these soybean cakes. He says it’s not the taste of it, but rather the texture (tempeh is essentially a brick of compressed soybeans, and it falls apart when you chew it). No matter how I try to tempt him, no matter the marinade or the magic in the preparation, my husband will take a polite bite, grimace, and say “No, thank you. Sorry.” Oh- he is missing out. My gain (or loss- since I made the fantastical claim of effortless weight loss above).

Tonight felt like a salad night. Since I’ve started a 30-day vegan challenge, I was looking for a dressing that suited me. The ready-made dressings in my refrigerator door were all either cheese or dairy-based (even the Italian dressing had Romano cheese in it!). So, happily, I had another chance to eat the cashew cream I made the other day. With a few additions I had a creamy Italian dressing that made me happy happy happy!

Tossed Tempeh Salad with "Creamy" Italian Dressing

1 package tempeh
Salad fixings I used lettuce, artichoke hearts, olives, and tri-colored bell peppers
1 tablespoon cashew cream
½ teaspoon nutritional yeast flakes
1 teaspoon minced garlic
1 teaspoon Italian seasoning
Unsweetened almond milk, for thinning your dressing
Olive oil for frying
Sea salt to taste


1. Cut tempeh cake in half, then take each piece and cut it in half again, so you have 4 thin pieces about the size of a deck of cards.
2. Heat the oil in a skillet over medium-high heat. Brown the tempeh on both sides until it is browned up and beginning to carmelize a bit. Season it with sea salt while it cooks.
3. Drain tempeh on paper towels while you prepare the dressing.
4. In a small bowl, combine the cashew cream with the yeast flakes, garlic and Italian seasoning. Stir to combine. Slowly add almond milk, little bits at a time, and stir mixture until it's thinned to your liking.
5. Add dressing to your salad fixings and toss lightly. Cut the tempeh into bite-sized chunks and add to your salad.

Note: You can easily make this dressing taste like ranch by switching out the Italian seasoning and adding chives and parsley with a tiny bit of lime juice.

Pin It!

Sunday, August 28, 2011

Gardein Cutlets with Roasted Asparagus, Savory Amaranth and Cashew Cream


It is going to take longer to type this post than it took to cook this meal!

When I was originally stocking my pantry for my venture into vegetarianism, I dedicated an entire shelf to grains of all kinds. Most of my collection has been used multiple times in the past year (even teff, which I had never even heard of and now use often). I've had one package of amaranth sitting on that shelf, and had only used it once or twice for bread. Amaranth seems to be used quite often as a hot cereal. It cooks up a lot like Cream of Wheat, with a very similar texture.

Problem is, I'm not much of a "cereal for breakfast" kind of gal. So- there the amaranth sat, waiting patiently for it's turn in the bread-making rotation.

This recipe started out centered on the amaranth. I wanted to make something that was savory and creamy and warm in the belly. Start to finish was about 30 minutes, or the time it took for the amaranth to cook.

Cashew Cream
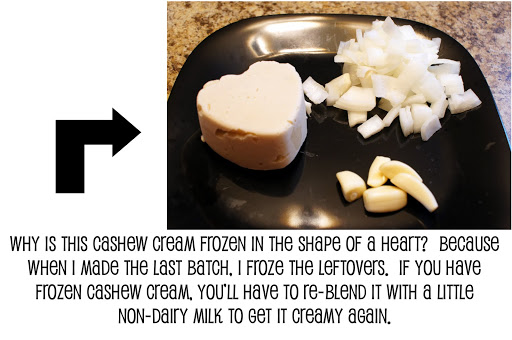
Typically, cashew cream is made after soaking the cashews in water overnight. I hadn't thought of making it, though, until I had already started dinner. I made it in less than 5 minutes, with no prior soaking, and it was still creamy and delicious. This keeps in the refrigerator for 3 days. You can also freeze it (but may need to re-blend when it thaws). It's a beautiful and easy way to "cream up" a dish, from soup to sweets, whether you use it plain or add flavor like nutmeg and vanilla.

2 cups raw cashews, whole
Purified water (enough to just cover the cashews when they're in the food processor or blender)


1. Put cashews into a food processor or a really good blender (Vita-Mix seems to be the brand of choice on the foodie blogs I visit)
2. Do a quick pulse to break up the nuts a little bit prior to adding water. Most recipes I've read have you add the water and whole nuts together then blend them both. I tried that and the water sprayed out of my food processor and doused my t-shirt. (Sounds sexy, but it wasn't!)
3. Add only enough water to just cover the nuts. Thicker cream calls for less water.
4. Blend until smooth and creamy, adding little bits of water as necessary. If you're patient, it will get nice and smooth. I was mostly patient, so I had some teeny-tiny texture going in mine; it worked really well for this particular recipe, though.
5. Chill cream in the fridge until ready to serve.


Simply Savory Amaranth

1 cup Amaranth Grain
3 cups Imagine No-Chicken Broth
1 tablespoon minced garlic
1 teaspoon poultry seasoning
1 dollop Earth's Balance
Sea salt and freshly ground pepper to taste


1. Add amaranth, broth, and seasonings to pot and bring to boil. Reduce heat to low simmer and cook for about 30 minutes, until the liquid is absorbed and the grain has thickened.
2. Stir in dollop of Earth's Balance prior to serving up if desired.

Roasted Asparagus
This is a no-frills, easy-peasy way to cook asparagus.

1 bunch of fresh aparagus, cleaned and trimmed
1 tablespoon olive oil
½ teaspoon garlic powder
½ teaspoon onion powder
Sea salt and freshly ground black pepper to taste


1. Preheat oven to 425° (I make this in my toaster oven at the same temperature)
2. Pour the oil and spices on the baking sheet and, using your hands, roll the asparagus around in the mixture until they're coated with yumminess.
3. Spread the asparagus out evenly, and roast in pre-heated oven for about 10 minutes.
4. When done, trim stalks into 1" segments.

Gardein Cutlets

1. Cook frozen Gardein cutlets in skillet on medium-high in some olive oil. Season with salt and pepper.
2. Cook cutlets until they are heated through and begin to turn brown on each side.
3. Let cutlets rest about a minute prior to cutting them and serving.

Pin It!

Vegetarian since:

© 2011 Vegerrific

All content and photography by Krevia™ Media, 2011. No portion of this website may be duplicated, copied, published or rewritten without prior consent. All Rights Reserved.


Twitter Delicious Facebook Digg Stumbleupon Favorites More

 
Creative Commons License
Vegerrific by Kreiva™ Media is licensed under a Creative Commons Attribution-NoDerivs 3.0 Unported License.