#navbar-iframe { height:0px; visibility:hidden; display:none; }
Showing posts with label bananas. Show all posts

Sunday, June 30, 2013

Instead of Winning Powerball Numbers, I Dream Up an Almond Butter-Chocolate Chunk Cookie Recipe.


I'm on summer vacation.  I know people think that teachers have it soooooo easy in June, July, and August, but that isn't always the case.  Many of us (myself included) are taking classes, teaching summer school and attempting to entertain our own kiddos 24/7.  Even so, I am lucky enough that I am getting a break from getting up at 5 am and heading out to work in complete darkness.

One of my problems, though, is I have a very difficult time sleeping in.  I want to.  I really really want to.  I just can't do it.  So I have gotten into the habit of doing little solitary projects in the early hours of the morning while my menfolk are still sleeping. 

This morning as I woke up I realized I had been dreaming about a cookie recipe.  Such is my life, I guess.  Anyhow, I've been reading a lot about gluten-free baking and also the whole paleo diet movement.  I think it's interesting how similar the gluten-free and paleo diets are to vegetarian diets (with the obvious exception of meat).  I thought I would try to create a cookie that was gluten-free, sugar-free, dairy-free and both vegan AND paleo-friendly.  I went to bed last night thinking about it, and woke up with the recipe in my head.

I love how these turned out.  Out of the oven they were crispy on the outside and chewy on the inside.  The chocolate was all warm and melty and I convinced myself that they had no calories.  I have to say, however, that much like an 8th grade girl's promise to keep something a secret, these cookies don't last long.  They are best for the first hour after baking.  After that, they become quite cakey and lose their outer "cookie crunch."  I decided to freeze the leftover cookies, though, and plan to mix them into some almond milk ice cream once I work off the half dozen I ate this morning.


1 ripe banana
1/2 cup crunchy almond butter
1 tablespoon flax meal mixed with 3 tablespoons water (mix and allow to sit until goopy)
2 tablespoons maple syrup
1 teaspoon vanilla
2 cups almond meal
1/4 teaspoon baking soda
1/4 teaspoon sea salt
2/3 cup almonds, coarsley chopped
1/2 cup dark chocolate, coarsley chopped
 
 
1.  Cream banana with a mixer until there are no chunks.  Add all the wet ingredients and mix well.
2.  Fold almond meal into liquid.  Fold in chocolate and almond chunks.
3.  Put mixture into the refrigerator for an hour so it firms up a bit.
4.  Preheat oven to 350°.  Use a non-stick cookie sheet or make sure you grease yours or use parchment paper (I used a non-stick sheet AND greased it as well).
5.  Portion dough out using a small scoop.  Pat them out on the tray as big as you'd like; they won't really spread and if you leave them too thick they won't cook well in the middle.
6.  Bake for 12 to 14 minutes, or until they crisp up and the edges begin to darken.  I suggest doing a test cookie first to find your baking time (these ingredients are pretty pricey so you don't want to screw up a batch by under or over cooking).  The bottom of the cookie browns up pretty quickly, so keep an eye on the clock.
7.  Cool slightly on the sheet then move to a wire rack.  Serve while they're still warm.  Makes about 18 cookies.


Pin It!

Tuesday, April 9, 2013

Baked Banana-rama x 3


Well, Folks, it's official:  I am spending too much time dreaming up ways to use the banana surplus at our house.  My four-year-old, who if given the choice would've lived on bananas and Pop-Tarts alone, has recently announced that he is "mostly done" with the fruit.  This leaves me over-thinking the purchase each week.  If I buy too few he is sure to decide his decision about giving them up was too hasty.  If I buy too many, well . . . you get the idea.  Another blog post.

For this recipe, I had about a half dozen over-ripe bananas and too much time on my hands.  I baked the batch, added some candied walnuts (which were so good I almost didn't have enough to use in the pictures because I would not stop eating them) and then did the final preparation three ways:  straight-up baked bananas, banana pudding, and banana ice cream.  


Candied Walnuts

1 cup whole walnuts
1/2 cup agave syrup or maple syrup (or honey for non-vegans)
1 teaspoon allspice
1/2 teaspoon fine sea salt
1/4 teaspoon cayenne pepper


1.  Heat all ingredients (except walnuts) over medium; stir once until mixed then cook until sugar is dissolved, about 3 minutes.
2.  Add walnuts and bring to a simmer.  Give the mixture a good stir to coat then cook for about 5 minutes while the sugar browns up a bit.
3. Drain walnuts in a mesh sieve over a bowl to catch the hot sugar mixture.  Spread the walnuts over wax paper on top of a wire rack.  They will get all crunchy and yummy as they cool.
4.  Spread the reserved hot sugar on a cookie sheet covered in wax paper.  When the sugar mixture starts to harden and cools enough to touch (about 2 minutes), peel from the wax paper and set aside to harden on the cookie sheet as you prepare the bananas.  Makes 1 cup walnuts and about a 1/4 cup of the candy chunks.


5.  Once the sugar has hardened on the cookie sheet, bust it up with a mallet into candy chunks and set aside.


Baked Bananas


Half a dozen or so over-ripe bananas
1/2 cup coconut milk
1/4 cup brown sugar

Steps:

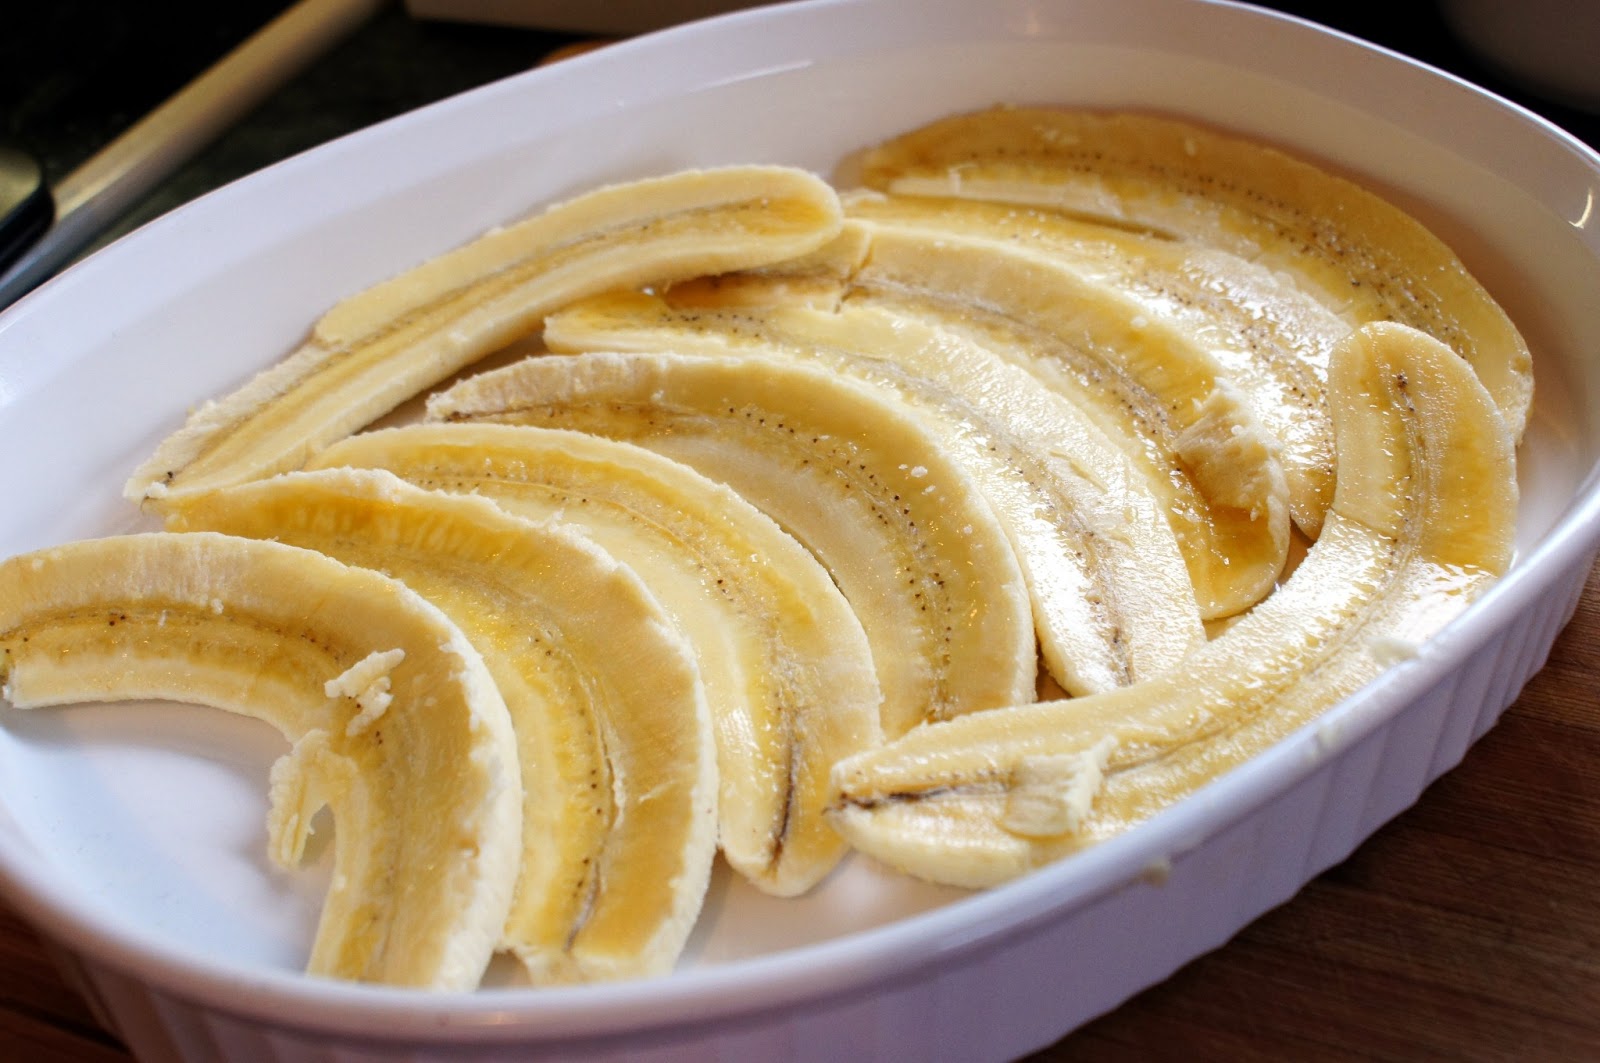
1. Slice the bananas lengthwise and place into a baking dish


2.  Pour milk over bananas and sprinkle all with brown sugar.
3.  Bake uncovered at 350° for 30 minutes.


4.  Now, decide how you want to serve them!


Baked Bananas

1. Carefully plate the bananas and sprinkle with walnuts, candy chunks and a dash of cinnamon for color. Serve warm or cold.


Baked Banana "Pudding"


1.  After baking bananas, purée them in a food processor until the consistency of pudding.  Add some of the baking liquid (the milk and sugar) as needed to get it to desired creaminess.
2.  Sprinkle with walnuts, candy chunks and  cinnamon. Serve warm or cold.


Banana Ice Cream with Candied Walnuts

1.  After baking bananas, purée all but 2 of them to a smooth consistency.  Add some of the baking liquid (the milk and sugar) as needed until mixture is nice and smooth.
2.  Gently add reserved bananas, cut into chunks.  Add 1/4 cup of the walnuts and stir carefully until mixed.


3.  Add mixture to a small container for freezing.  Smooth it down to make sure it freezes uniformly.
4.  Coarsely chop another 1/4 cup of walnuts and cover the top of the mixture as pictured.  Add the sugar chunks as well.  This will be the bottom of the ice cream.


5. Cover and freeze upside down overnight.
6.  Top with remaining walnuts to serve.


Pin It!

Saturday, December 29, 2012

Banana Bread for my Bambino


We go through bananas like crazy in my house.  My sons and I live 40 minutes away from where they go to school and I teach, and the promise of a banana for breakfast gets my 4-year-old out of bed at 5:30 in the morning (he actually just asked for a banana as I write this post . . . too funny).   In spite of living with a potassium junkie, I occasionally have overripe bananas stinkin' up the joint.  I made this version of grandma's bread using candied pecans I had left over from my Thanksgiving baking.  With or without the pecans, this is a hearty bread and reaches it's maximum yumminess a day after baking.  It also freezes well; I pre-slice and freeze so I have it handy for a quick breakfast.

1 cup shortening
2 cups sugar
4 eggs
4 large, overripe bananas, puréed
3 teaspoons baking soda
3 cups white flour
1 teaspoon salt
1 1/4 tablespoons vanilla extract
3/4  tablespoon maple extract
1 teaspoon cinnamon
1 1/4  cups toasted walnuts, chopped
3/4 cup candied pecans, chopped fine
(toss about a cup of whole pecans with 2 tablespoons of honey.  Layer on waxed paper and toast in the oven at 200º until honey hardens up a bit.  Cool completely then process in a food processor until there are no large chunks)


1. Preheat oven to 350º. Cream shortening and sugar with mixer. Add eggs and cream again. Add extracts and mix to combine. Add bananas a bit at a time.
3. In a separate bowl, mix all the remaining dry ingredients together. Slowly fold flour mixture into banana mixture. When all flour is wet, mix batter with hand mixer; don't overmix.  Gently fold in walnuts and pecans.
4.  Divide evenly into 2 greased bread pans (batter will be thick). Bake for about 1 hour at 350º. Reduce heat to 300º and bake for another 10-15 minutes, or until knife inserted in center comes out clean.


Pin It!

Wednesday, June 29, 2011

When Life Gives You Over-ripe Bananas, Make Ice Cream!

I scream, you scream, we all scream for frozen bananas which, when pureed, taste a hell of a lot like ice cream . . . .

Yesterday I found a bunch of over-ripe bananas at my grocery store. They were all bound up in red tape like they were crime scene evidence. I liberated that fruit and made good use of it! Here's a really simple treat, that literally takes 5 minutes to prepare (minus freezing time). It's smooth and creamy and the banana flavor is very subtle.

Banana Ice "Cream"


MY BANANA ICE CREAM

Consider this recipe something to build on. You can easily change flavors based on what you add to it: candies, syrups, fruits- you name it!

4 over-ripe bananas, frozen (figure about 1 banana per person)
1 tablespoon of good-quality vanilla extract (or maple, walnut or whatever flavor you desire)
1 tablespoon natural sugar (more or less to taste)
Your choice of add-ins. I used chocolate chips, but any ice cream-friendly ingredients will do. Go nuts (yeah- nuts would be good, too)!

1. Freeze bananas overnight. I recommend chopping them into smaller chunks prior to freezing so they're easier to purée later. I learned this the hard way!
2. Using a food processor, purée the frozen bananas. Add vanilla (or other flavoring) and sugar and mix well.
3. Mix in whatever you like, and return the ice "cream" to the freezer to firm up.
4. Enjoy!

Banana Ice "Cream," step-by-step

Pin It!

Vegetarian since:

© 2011 Vegerrific

All content and photography by Krevia™ Media, 2011. No portion of this website may be duplicated, copied, published or rewritten without prior consent. All Rights Reserved.


Twitter Delicious Facebook Digg Stumbleupon Favorites More

 
Creative Commons License
Vegerrific by Kreiva™ Media is licensed under a Creative Commons Attribution-NoDerivs 3.0 Unported License.