#navbar-iframe { height:0px; visibility:hidden; display:none; }

Wednesday, September 28, 2011

Stuffed Pumpkins with Grains and "Chicken"


My friend, Michele, is my favorite guinea pig when I try out a new recipe. Not only is she guaranteed to try everything, she also washes every dish. Who could ask for more?


She came over for this little pumpkin experiment. I'm working on ideas for Thanksgiving and I thought the flavors and presentation would make this a beautiful side dish.


Stuffed Pumpkins with Grains and "Chicken"

4 small pumpkins
1 quart Imagine No-Chicken Broth
1 tablespoon Earth Balance
¼ cup long-grain brown rice
¼ cup forbidden rice
½ cup wheat berries
¼ teaspoon nutmeg
½ pound ground Match "Chicken" meat
½ cup dried cranberries (optional)
½ teaspoon cinnamon
¼ teaspoon ground ginger
¼ teaspoon coarsley-ground black pepper
Salt to taste


1. Cut pumpkin tops off and scoop out the seeds (save those seeds! Roast them later!). Place pumpkins face-down in a baking dish. Add ½" of water to dish. Bake at 450º until you can pierce the skin with a fork (about 45 minutes to an hour).

2. Scoop flesh out of shells with a spoon (make sure to reserve the shells; you'll be using them as serving dishes). Put cooked pumpkin in a food processor and pulse until it is the consistency of a thick purée. Keep shells warm and set aside 1 cup of the purée until the rest of the recipe is prepared (go ahead and freeze the rest of the purée if you have more than a cup to use another time).

3. In a small pot, warm broth over low heat.

4. In a large skillet, melt the Earth's Balance over medium heat, then add the rice and barley and toast for 3 to 4 minutes, stirring occasionally. Season the grains with the nutmeg and stir in half of the warm broth. Cook until broth bubbles, about 5 minutes.

5. Meanwhile, cook the Match "chicken" in a little olive oil over medium-high heat. Season with cinnamon, ginger and pepper as it cooks. Add the cranberries if using, and stir until heated through. Set aside.

6. Stir remaining broth into the grains, ½ cup at a time, allowing the broth to be absorbed before adding more. Cook until the barley is tender, about 18 minutes.

7. When grains are tender, stir in the pumpkin. Cook over medium heat until just heated through, about 1 minute more. Add the cooked Match "chicken" and mix well. Taste and adjust seasoning and add salt if needed. Scoop mixture into warm pumpkin shells and serve.

Pin It!

Wednesday, September 21, 2011

Creamy Coconut-Curry Sauce


There aren't many restaurants in my neck of the woods where one can get a satisfying vegan meal (you know, one with actual protein in it). Sometimes when I go out with friends, I'm reduced to eating french fries (which doesn't do me any favors). My regular lunch date, Kate, has been extremely patient with me as I've begun to eat a vegan diet. I'm like Sally from "When Harry Met Sally," with everything prepared specially or "on the side." The other day, we ate at a chain restaurant called "Stir Crazy." It was a great meal, due in large part to a patient server and a very vegan-friendly menu. I had the coconut-curry vegetable dish and became obsessed with recreating it at home. Kate, who had also tried it, said she was going to stop taking my calls until I figured it out; I kept calling to ask if she tasted this or that in the sauce.

I've never cooked with curry in my life. In fact, before I tried this my jar of curry had never been cracked open (I bought it over a year and a half ago). I am so pleased with the results, though, because this tasted better than the inspiration in my opinion.

Creamy Coconut-Curry with Dry Fried Tofu

1 can light coconut milk
1 tablespoon corn starch
1 tablespoon spicy curry powder (or more to taste)
1 tablespoon minced garlic
½ tablespoon fresh, minced ginger
½ tablespoon minced hot peppers (or more to taste)
1 tablespoon good-quality ketchup
1 teaspoon onion powder
1 teaspoon tumeric
½ teaspoon sea salt
Freshly-ground black pepper
Stir-fry fixings (I used dry-fried tofu*, red bell pepper, mushrooms, onions, broccoli, coarsley-chopped peanuts, garlic and ginger)
Prepared vegan Japanese noodles (I used soba; I wanted to use udon like the dish I tried to recreate did, but the ones I purchased had egg whites in them. The soba noodles were good, but next time I'm making homemade udon noodles with this recipe!)


1. Pour half of coconut milk into a cup and stir in cornstarch; stir briskly until smooth and set aside.
2. Pour the rest of the coconut milk and all remaining ingredients into a pot over medium heat. Whisk constantly to keep milk from scorching.
3. When it begins to bubble, add milk-cornstarch mixture and whisk well. Stir sauce until it's hot, bubbly and creamy.
4. Prepare stir-fry fixings and noodles. Add well-drained noodles to stir-fry. Add curry sauce and toss everything to coat well. Top with some more minced hot peppers if desired.

*To dry-fry tofu: cut well-pressed, extra-firm tofu into cubes. In a DRY, hot skillet, brown the tofu on both sides, gently pressing out any remaining water as you do so.

Pin It!

Tuesday, September 20, 2011

Tempeh Bacon (Insert Clever Bacon Pun Here)


I admit, I had been known to partake in bacon (of the pig variety) in my former life. Leaving bacon behind to become a vegetarian wasn't a deal breaker for me, though, like it is for many others. It would be nice if there was a real-live, super-duper substitute of the veggie kind for bacon, but I'm not holding my breath. What makes real bacon so bacon-y is everything that classifies it as meat. Substitutes are either tooooooooooo salty, too chewy, or too not bacon. I have yet to try any that I can choke down and even the varieties other vegans swear by are unpalatable to me.

So, damnit, I made my own bacon-type substitute. My first disclaimer is that it AIN'T BACON. You must let that go. If finding vegan bacon is standing between you and true bliss, well, I don't see happy skies in your future. Even so, this recipe fills an empty "bacon space" on a breakfast plate or tucked into a sandwich. I mixed and matched recipes I found and then added my own little touches until I had it just the way I liked it. Besides, I hear they take away your vegan merit badge if you don't come up with a tempeh bacon recipe. So, here's mine!

Tempeh "Bacon"

16 ounces tempeh, sliced über-thin, as pictured (man oh man, be careful. Take your time because it really wants to fall apart, but the thinner it is the better it will turn out)
¼ cup maple syrup
4 tablespoons olive oil
2 teaspoons cumin
1 teaspoon cayenne pepper
3-4 teaspoons liquid smoke
4 teaspoons soy sauce
2 teaspoons coarsely-ground black pepper
1 tablespoon minced garlic
1 teaspoon Mrs. Dash Extra Spicy
1 teaspoon Mrs. Dash Steak Grilling Blend
2 teaspoons olive oil for grill


1. Add all marinade ingredients to a large bowl and mix well.
2. Add the tempeh and marinade to a marinating container, making sure to alternate the marinade and tempeh slices. You want the tempeh to be wet with the marinade on all sides.
3. Marinate for a few hours or overnight.
4. When ready to make, carefully remove tempeh from marinade and put on a hot grill. I use a George Forman grill, so it gets good and crispy on both sides and has the groovy grill marks. Go lightly with the oil; too much and you get a mushy mess. I grill it until it starts to dry out a bit, to give it a more bacon-y texture. If you think it needs a tad more flavor, brush with a little reserved marinade as you grill it. Just be sure to cook off the liquid and try not to get too excited as it starts to carmelize.
5. Serve in your favorite sandwich, as a side for breakfast, or crumbled into anthing that's yearning for bacon. Enjoy!

Pin It!

Snappy Turtle Cookies (or, Saying "I Love You" with Vegan Cookies Means Never Having to Say You're Sorry for Salmonella Poisoning)


These are my favorite cookies . . . one of Grandma's recipes. I'm not sure what's "snappy" or "turtle-y" about these babies, but they've been called that for over 70 years, so who am I to buck family tradition? I love that these are simple and sweet (but not too sweet). These are more a tea-cake cookie, and are just perfect with a warm cup and good gossip from the gal next door.

The original recipe, from the 1940's, was probably pretty expensive to make during wartime; it called for 3 eggs and butter. As I look through family recipes like this to veganize, I'm always amazed that war brides didn't go ahead and veganize recipes themselves. Grandma had all sorts of ways to replace the dairy during rationing, but usually exchanged eggs with mayonnaise or butter with Oleo (which, by all accounts, sounds disgusting even if it was dairy-free). Too bad most people hadn't thought of flax meal. There were probably some pretty disgusting cookies shipped overseas during WWII!


½ cup Earth Balance
½ cup Florida Crystals brown sugar, packed
2 eggs' worth prepared flax meal (2 tablespoons of flax meal mixed with 6 tablespoons of water. Allow to sit for a few minutes so the mixture thickens)
1½ cups unbleached white flour
¼ teaspoon baking soda
¼ teaspoon salt
1 heaping tablespoon flax seeds (optional)
½ teaspoon vanilla
½ teaspoon maple extract
2 cups chopped pecans (more or less as needed)
½ cup maple syrup (more or less as needed)
3½ ounces dark chocolate (72% cacao), melted


1. Preheat oven to 350º. Cream together Earth Balance and brown sugar. Add prepared flax meal, vanilla and maple flavoring, mixing well.
2. In another bowl, mix flour, soda, salt and flax seeds (if using), then slowly add to Earth Balance mixture until well blended.
3. Portion dough out with a tablespoon and roll into balls. Dip each ball into the maple syrup, then coat ball with pecans. Flatten each ball gently as pictured. Bake for 12 minutes, or until they start to firm up a little and begin to get darker (I bake mine exactly 12 minutes and they are heavenly). After they are cooled completely, drizzle with melted chocolate if desired. Makes about 1½ dozen cookies (or 1 serving for me!).

Pin It!

Sunday, September 18, 2011

Peanut Butter and Jelly Ice Box Cookies


Soooooooooooo, school's back in session. I'm a teacher by trade, and this time of year is still filled with school supplies and new shoes. It's also when my kids and I start dreaming of goodies for our lunch boxes. For my boys, their thoughts turn to peanut butter and jelly sandwiches (their fave for lunch).

In honor of the new school year and the reemergence of lunchtime treats, I thought I'd veganize my grandmother's recipe for her Peanut Butter and Jelly Ice Box Cookies. Fair warning: I am not a baker. I lack skill and patience to make cookies pretty. The pictures reflect this. However, they were moist and lived up to their name. I brought them to school and left them in the teacher's lounge and they only made it to lunch. That's a good sign, considering there are some very discerning palates in the math department at my school.


Peanut Butter and Jelly Ice Box Cookies

¾ cup Earth Balance
1 cup Florida Crystals Sugar
¼ cup Florida Crystals brown sugar
1 cup natural peanut butter
2 eggs' equivalent of prepared golden flax meal (3 tablespons flax meal with 6 tablespoons water. Stir to mix and let stand about 5 minutes until thickened)
¼ teaspoon salt
2 cups unbleached white flour
½ cup spelt flour
¾ teaspoon baking soda (or 1½ teaspoons baking powder if, like me, you are out out out of baking soda but still want cookies!)
1 jar of jelly or preserves (your favorite kind)
Fresh nutmeg and chopped peanuts to garnish


1. Cream together shortening and sugars. Add peanut butter, flax mixture and salt. When well mixed, add flour and baking soda (or powder), blending well.
2. Form mixture into two logs (about the diameter of a paper towel roll) and wrap in wax paper. Put in “ice box” for a few hours or overnight.
3. Preheat oven to 350º. Remove wax paper. Cut rolls into ¼” slices and place cookies on a non-stick cookie sheet. Make an indentation in each cookie. Top each with a teaspoon or so of the jelly. Alternately, roll each slice into a ball and bake in mini-muffin tins. Make indentations with your finger and top with jelly (as pictured). Bake for 8 to 10 minutes (if using muffin tins, bake 10-13 minutes). When they are still hot from the oven, sprinkle with crushed peanuts. Makes about 2 dozen.

Pin It!

Friday, September 16, 2011

Mushroom and Wild Rice Tarts with Truffle Oil-Infused Crust


I am getting sassy in the kitchen, People! Time was mixing flour and rolling it out into some pie-shaped configuration was the stuff of nightmares for me. No longer! This entire meal was built around the following thought: What would happen if I used this ridiculously over-priced white truffle oil in a pie crust?


This tart was creamy and warm and using the truffle oil made me feel like a real foodie type. I made this recipe up as I putzed along, but wrote down what I was doing as I went. Hopefully you can recreate it, because it was too good to be vegan!


Mushroom and Wild Rice Tarts with Truffle Oil-Infused Crust

3 cups prepared rice (I like to use wild rice or Wehani rice, prepared in vegetable broth)
1 cup cold mushroom gravy (recipe follows)
6 button portobello mushrooms, sliced
1 cup leeks, chopped
1 tablespoon Italian seasoning
1 tablespoon garlic
Olive oil
Smoked paprika
Parsley for garnish
Truffle Oil-Infused Crust, unbaked (recipe follows)


1. Preheat oven to 350º.
2. Sauté vegetables in a little oil until they just start to get tender.
3. Add all of the ingredients up through the garlic into a large bowl and mix well.
4. Put mixture into 6 prepared (but uncooked) tart crusts. I had exactly enough of the mixture for 6 (4") tarts.
5. Sprinkle tarts with a little smoked paprika, and bake in pre-heated oven for 30 minutes, or until hot and the crust begins to brown up.
6. Remove from tart pan and garnish with parsley.

Mushroom Gravy (Cheater's Version)


1 container Imagine Creamy Portobello Mushroom Soup
2 tablespoons white, unbleached flour
2 tablespoons Earth Balance
1 heaping tablespoon nutritional yeast
¾ tablespoon garlic powder
¾ tablespoon onion powder
1 tablespoon soy sauce
Sea salt and freshly ground black pepper to taste

1. Melt Earth Balance over medium-high heat and add flour. Stir until flour gets fragrant and begins to brown. Slowly add soup, little bits at a time, whisking well during each addition to break up the flour.
2. Continue whisking until all the soup is added. Bring to boil.
3. Add all remaining ingredients, mixing well, then lower heat to simmer, whisking until thick and creamy.

Spelt Pie or Tart Crust for a Savory Main Dish
This recipe will make 2 (9") pie crusts or 6 (4") tart crusts.

2 cups spelt flour
1 cup unbleached white flour
½ teaspoon sea salt
1 teaspoon white truffle oil
½ cup olive oil
¾ cup unsweetened almond milk, very cold


1. Combine flour and salt in a food processor; pulse a couple times to mix well.
2. In a separate bowl, whisk together oils and milk. Drizzle mixture into the food processor and pulse 6 to 8 times, until the dough resembles coarse chunks (don't work it too much or it will be tough. If you can squeeze some together and it holds its shape it's done). If the dough doesn't hold together, add a little more milk and pulse again.
3. Remove dough from machine and place in a mound on a clean surface. Gently shape into 6 equal balls (for small tarts; if making pie, shape into 2 equal balls).
4. Roll each ball out and carefully fit dough to tart pans or pie plate. Let rest a few minutes, allowing it to come to room temperature, before you add a savory filling.

Pin It!

Saturday, September 10, 2011

Teriyaki-Flavored Happiness (or, These Vegetables Aren't Going to Eat Themselves!)


If you've been following my blog, you may notice the same ingredients used in multiple recipes. There's a really good explanation for that: I'm a normal person and not a gourmet cook. I make a trip to Whole Foods once or twice a year, for example, to purchase specialty ingredients and to stock my freezer with vegan meat alternatives. Other than that, I'm shopping down the street at Kroger, Meijer, or on a day when the three boys aren't trying to kill each other in the back of the mini-van, I may get a trip into the local health food store.

As far as the purchase of fresh vegetables goes, I have learned to think with my brain and not with my eyes in the produce section. When I stopped eating meat, I suddenly became a fresh vegetable hoarder. I. Had. To. Have. Everything. Every color and variety of peppers, everything labeled as organic, each and every kind of leafy green. I wanted everything and I wanted it all at once. And like a hoarder, my "collection" took on a life of its own, quickly turning bad before I could get to everything. My peppers got soft and wrinkly, my organic mushrooms were covered in slime, and my leafy greens dissolved into gelatinous black goo. I had to admit I was throwing out more than I could eat each week.

So- after a few months of fuzzy tomatoes, I wised up. I started purchasing produce more strategically. I refused to make eye contact with that already-ripe avocado unless I knew I was going to use it that night. I bought less, and attempted to use all of it before I purchased more. I'm not always successful. Right now as I type this, there are four tomatillos well past their prime, mocking me from a bowl on my counter.

Which brings me back to the beginning of this post. I write this blog for people like me, who want to eat healthier but aren't about to run up to the grocery store each day. I'm a working mom with a realistic grocery budget who hates to waste food. If I bring home a bag of shallots, you're going to see shallots in most of my recipes until they're gone, People. That's just how I roll.

Today's recipe was made with all my remaining fresh vegetables prior to Friday's trip to Kroger. A stir-fry it is!

4 Gardein Scallopine cutlets, thawed
1 cup teriyaki sauce
2 teaspoons minced garlic
1 teaspoon fresh, ground ginger
1 teaspoon Five Spice powder
1 teaspoon onion powder
2 tablespoons agave nectar
1 tablespoon sesame seeds
1/2 teaspoon toasted sesame oil (optional)
Freshly ground black pepper
Vegetables for stir fry (I used cauliflower, shallots, portobellos, Brussels sprouts, bok choy and radicchio)
Grain of choice (I used brown rice)


1. Combine all the ingredients (except for vegetables and rice) and marinate for at least 20 minutes. I have a Food Saver Marinator, and it is one of my favorite things.
2. Add a little oil to a large skillet and heat it over medium-high heat. Add the marinated cutlets and cook about three minutes on each side, or until they start to brown up.
3. Add the reserved marinade to the cutlets in the skillet, and bring to boil. Reduce heat to simmer and let the marinade reduce down. You want it to get nice and thick, but still liquid-y enough to pour some over the vegetables when serving.
4. Meanwhile, do a quick stir-fry of the vegetables in a hot skillet with a little oil.
5. When it looks like the vegetables are almost done and the marinade is thickening, remove the cutlets to a platter so they can rest for about two minutes.
6. To serve, arrange vegetables over prepared rice, spoon a little of the marinade over them, and top it all with sliced cutlets.

Note: We had two cutlets leftover that we didn't eat. Later that night (as I am wont to do) I tiptoed to the kitchen under the cover of darkness for one wee bite more. The "chicken" was so good, ice cold and coated in the sauce, that I not only ate one entire piece, but TWO. I went to bed with sticky fingers and a smile on my face. So, long story short, these are amazing cold, and would be a great addition to a sandwich or salad, or as a midnight snack!

Pin It!

Thursday, September 8, 2011

Corn Fritters You Can Bring to a (Vegan) Hillbilly Hoedown


The first time I heard of corn fritters was as a little girl, thumbing through The Beverly Hillbillies Cookbook (yes, it's real. My mother used to have it. Ours was from the 1970's, but there appears to be a newish version from the 1990's). It was one of the first recipes I ever made on my own (with the exception of the frying in oil part- for that I was an eager spectator).

What I loved about corn fritters is that they combined two of my favorite things: corn, and deep frying! There were times as an adult that I had to admit I'd eat just about anything if it were deep-fried, and at least corn fritters started with a somewhat healthy vegetable.

When I thought about updating this to be vegan-friendly, I focused on more healthful choices of ingredients. What I didn't want was to essentially lose the guilty pleasure of eating them, though. So, suffice it to say these aren't going to melt your inches away. But they ARE chock full o' fiber, so there's that!

My favorite way to eat these is cold, but I'm told I'm weird that way. They're just fine hot, too. This basic recipe can easily be altered. For instance, use unbleached white flour instead of spelt for a "lighter" fritter, or add some cilantro and cumin, or you could omit the tumeric and peppers and sprinkle the finished fritter with vegan powdered sugar for a sweet treat. Whatever you do, be sure to drain them thoroughly after frying.

Corn Fritters

1 cup spelt flour
1 teaspoon baking powder
1 teaspoon salt
¼ teaspoon tumeric
1 teaspoon nutritional yeast
2 tablespoons golden flax meal mixed with 6 tablespoons of water (let it sit a few minutes to thicken)
¼ cup non-dairy milk, unsweetened
2 teaspoons grapeseed oil
15 ounces canned corn, drained
1 tablespoon (more or less to taste) diced cherry peppers
Oil for frying


1. Blend flour, baking powder, salt, tumeric and nutritional yeast in a bowl.
2. In a separate bowl, beat prepared flax meal with milk and oil. Stir into flour mixture and add corn and peppers. It might be easier to mix gently by hand. Mixture will be fairly wet and thick.
3. Drop by tablespoonful into hot oil. Press dough until it's flattened a bit while it fries. Cook on medium-high until golden brown, about 2 minutes per side. Drain thoroughly on paper towels. Serve hot, or chill for an hour or so in the fridge and serve cold.

Pin It!

Monday, September 5, 2011

Liberating Beatific Beans from their Flavor Packet Oppressor


Bean soup is a thing of beauty. The colors and textures of the beans combined with their nutritional properties make them something worth savoring. I love the bean aisle in my grocery story, but for some stupid reason the dried beans are relegated to the bottom shelf (much like poetry in a book store. Hmmm . . . that's an interesting coincidence). They are all so pretty to look at, and always so inexpensive. You really could live on 'em.

During my last couple of trips to my local grocery story I've paused in front of the bags of mixed beans, which always contain packets with "natural ham flavoring." The beans themselves are so healthy, why in the world would you tear open one of those oddly-colorless packets and injest that crap? To quote Snoopy, "Bleeeeech!"

Last week, I bought the darn bag anyway, and figured I could easily make a delicious bean soup without resorting to chemical suicide via powdered pig-essence.

NOTE: Yesterday's post included a marinade I made for my tempeh recipe. I used the reserved marinade for today's soup. If you didn't make that recipe (and why not? It is so darn good!) you can just use the ingredients for the marinade, simmer it to reduce it by half, then strain it before adding it to today's soup.

Beatific Bean Soup

20 ounce bag of mixed beans (sans the hellacious flavor packet)
Marinade from yesterday's post, simmered until reduced by half
1 container Imagine Low Sodium Vegetable Broth
1 container Imagine No-Chicken Broth
1 tablespoon of dark miso (if needed. You'll add it after a taste check if you do)
½ cup chopped onion
3 cloves fresh garlic, minced
1 tablespoon basil
1 tablespoon oregano
1 tablespoon nutritional yeast
1 teaspoon liquid smoke (definitely optional. If you aren't into "smoky" flavors, don't add it in)
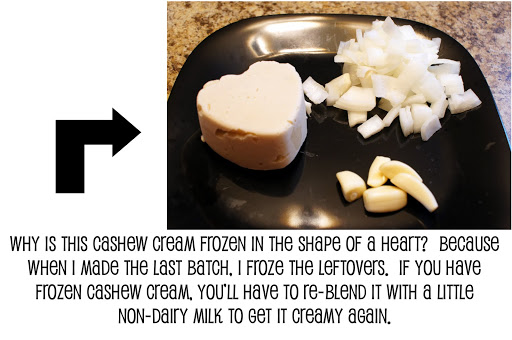
½ cup cashew cream (optional. It makes it creamy-dreamy. You could also add vegan sour cream or skip this part altogether)

1. Thoroughly pick through and rinse the beans. Put them in a glass bowl big enough to accomodate them doubling in size. Add enough water to cover and soak overnight. I do an initial drain and rinse after a few hours of soaking to clean the beans more. Then I add fresh, purified water because I use the soaking water in the soup. (Yep. You heard correctly. I know there are different camps on this, but if the beans are clean and the initial yucky stuff is rinsed off after a few hours of soaking, I say go for it. The flavor is better and the soup is creamier.)


2. The next morning, add the beans, the soaking water, and all of the remaining ingredients (except for the miso and cream) to a large Crock Pot and turn on high.


Note: If you DO add the miso, put it in a coffee cup with a ladle-full of hot broth. Mix it to dissolve it before adding it all back in the soup.

3. After 3 hours or so, taste the broth and determine if it could use some more saltiness; if so, add the miso.

4. Soup is ready to serve when the beans are tender. It took about 4 hours in my Crock Pot. Add a dollop of cashew cream or vegan sour cream if desired to each serving. Make sure to eat it with some good bread!

UPDATE! Like most of the country, we're big on leftovers. This recipe made A LOT, and so we were faced with 3 days of bean soup. Here's how I switched it up each day to make it more exciting:

Day 1 Leftovers:

Leftover soup
1 tablespoon minced garlic
1 cup chopped portobello mushrooms
1 cup diced onions or shallots
6 large Brussles sprouts, cleaned and quartered
½ cup quick-cooking barley
½ cup forbidden rice (or wild rice)
Salt and pepper to taste.

1. Put leftover soup (in batches, if necessary) into a blender and purée until creamy. Add soup to stock pot on stove and set to simmer.
2. Sauté barley and rice in a tablespoon of oil over medium heat until it begins to brown and get fragrant. Add grains to soup.
3. Add more oil to the skillet you used for the rice, and heat up the minced garlic. Add all the vegetables, tossing to coat with oil and garlic. Cook over medium heat until vegetables begin to camerlize. Add to soup.
4. Simmer soup until rice and barley are tender. Taste and add salt and pepper as needed.

Day 2 Leftovers Day (or is it day 3? By now I've lost count!)

Soup from yesterday (which will now have thickened very much, due to the barley and rice)
½ cup firm tofu, cut into cubes
1 tablespoon minced garlic
1 tablespoon freshly chopped cilantro (or half that if using dried)
1 teaspoon cumin
Minced hot peppers to taste (I use a hot pepper relish)
1 tablespoon Tofutti sour cream
Favorite wraps (whole wheat, etc)
Olive oil

1. Reheat the "soup," which will now have the consistency of refried beans.
2. Meanwhile, sauté the tofu over medium-high heat with olive oil, cilantro and cumin until it starts to brown up a bit.
3. Mix in a ½ teaspoon or more of minced hot peppers into a tablespoon of vegan sour cream. Spread cream mixture on a wrap.
4. Build a wrap with the "soup" and tofu. Toss in some Daiya cheese or avocado slices if you're feeling it!

Pin It!

Vegetarian since:

© 2011 Vegerrific

All content and photography by Krevia™ Media, 2011. No portion of this website may be duplicated, copied, published or rewritten without prior consent. All Rights Reserved.


Twitter Delicious Facebook Digg Stumbleupon Favorites More

 
Creative Commons License
Vegerrific by Kreiva™ Media is licensed under a Creative Commons Attribution-NoDerivs 3.0 Unported License.